Looking to add some green to your home? Get ready to embark on a DIY adventure with charming and budget-friendly planters! Our collection of fun and easy ideas will inspire your creativity and fit perfectly in your space. From repurposed containers to imaginative designs, these planters are affordable, achievable, and ecological! Get ready to bring nature indoors and let your creativity flourish!
Repurposing Wooden Drawers
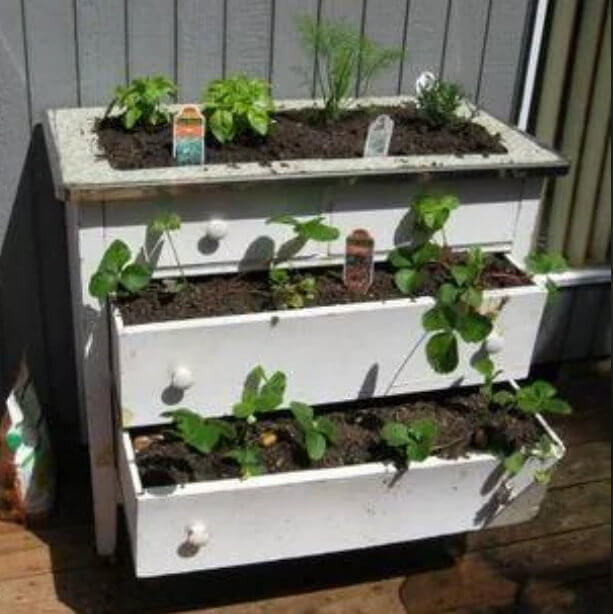
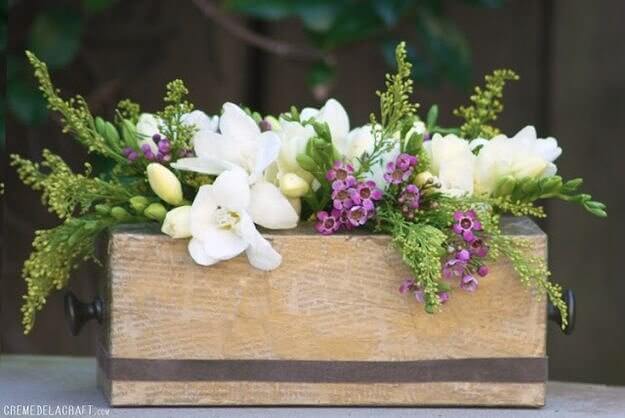
Aren’t these plant boxes impressive? They look so professionally finished it’s hard to believe these aren’t commercially bought planters. Amazingly these are the beautiful handiwork of an ordinary citizen! What’s more, they are the inexpensive result of recycling some second-hand wooden drawers. Of course, only good wood, like cedar or redwood, will do.
If you make one like this, before filling it with sand, be sure to smoothen the interior surface well with sandpaper. Then pierce some little holes in the bottom to allow water to escape. Plants hate having wet feet! So, if the water does build up in the bottom you won't be able to enjoy such lovely, healthy, thriving plants as we see here. Now fill your new planter with your favorite pretty little plantlings.
Watering Can Decorations
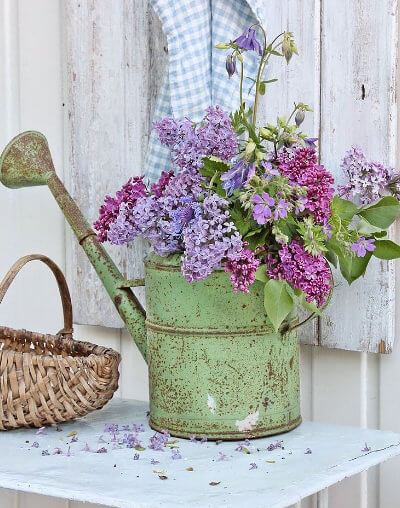
Watering cans are a requisite for those gardeners who have collections of containers, especially on their patio or deck. But watering cans can also be decorative items in garden design, as planters, or as vases for cut flowers. So, don’t be so quick to discard your old watering can. It can be creatively repurposed so beautifully, cheaply, and effectively.
Imagine how attractive one will look displayed in your garden, or positioned in a flower bed when spilling over with a few complementary colored or shaped pot plants. Or, how striking a watering can will look as a flower vase filled with an abundance of pretty blooms on your patio or entryway, or indoors on your entrance hallway table. Protect the environment and reuse your old one!
Wall-Hangings With Plants
As an indoor plant lover, you’re bound to have lots of lush greenery in plant pots around your space. Plants don't only bring life into our interior space but also improve the air quality in our homes as they convert carbon dioxide and release it back as oxygen, which is very beneficial to our health and well-being.
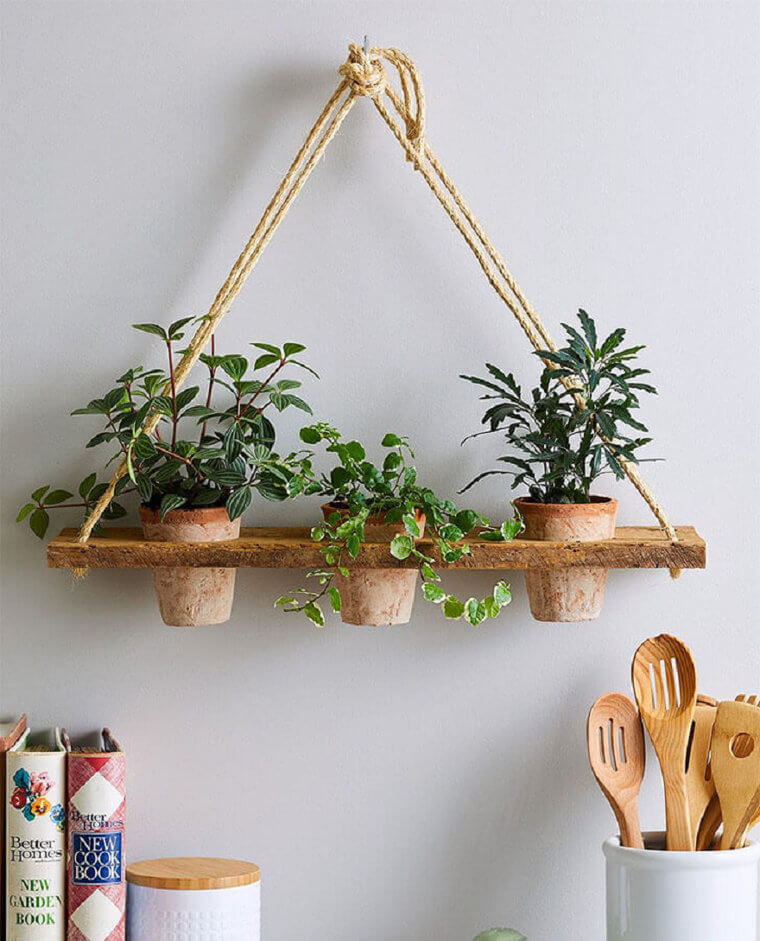
There are several ways to create living wall DIY plant decorations. Some won’t even require holes drilled into the walls just the support of adhesive tape and wall mounts. One idea is a wooden shelf hanging and containing some small plants, some being trailing types, in pots, or even in glass vases suspended against the wall. Just don’t forget to water them!
Bottom-Up Planting
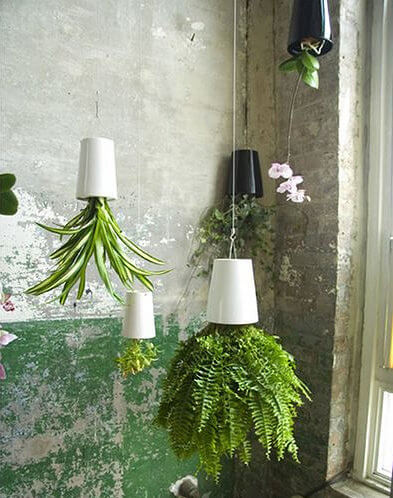
When there just isn’t any more space in our homes, we have to get inventive. Growing them upside down by a window is space-saving, will discourage soil pests, and beautify that space. Get creative and pretty up your container with a coat of pastel paint or wrap it with colorful washi tape or jute fiber.
Make a hole in your now decorated container—big enough for the plant but small enough to keep that soil in when it's flipped. Fill it with soil, pull the plant through the hole, and suspend the container from a hook. Pro tup: Spice up your cooking preparation and suspend your favorite and regularly used herbs in the kitchen for quick and easy access!
Tempting Tissue Holders
If you don’t know what to do with those spare charming ceramic tissue holders and dispensers, then how about re-functioning them into delightful interior plant holders? Fill them with fresh soil, and add your choice of garden greenery and a barrier of tiny pebbles around the plant. The pebbles will absorb the excess water and then release the water if the pot should be drying out.
But, did you know that plants prefer glazed ceramic pots to terracotta, plastic, and metal pots? When they are shiny inside from the glaze, the pots are far more durable and the soil is less likely to dry out. So make good use of these little ceramic tissue holders. They look great in singles or as an interesting collection together, perhaps in a circular tray.
Transforming Tires
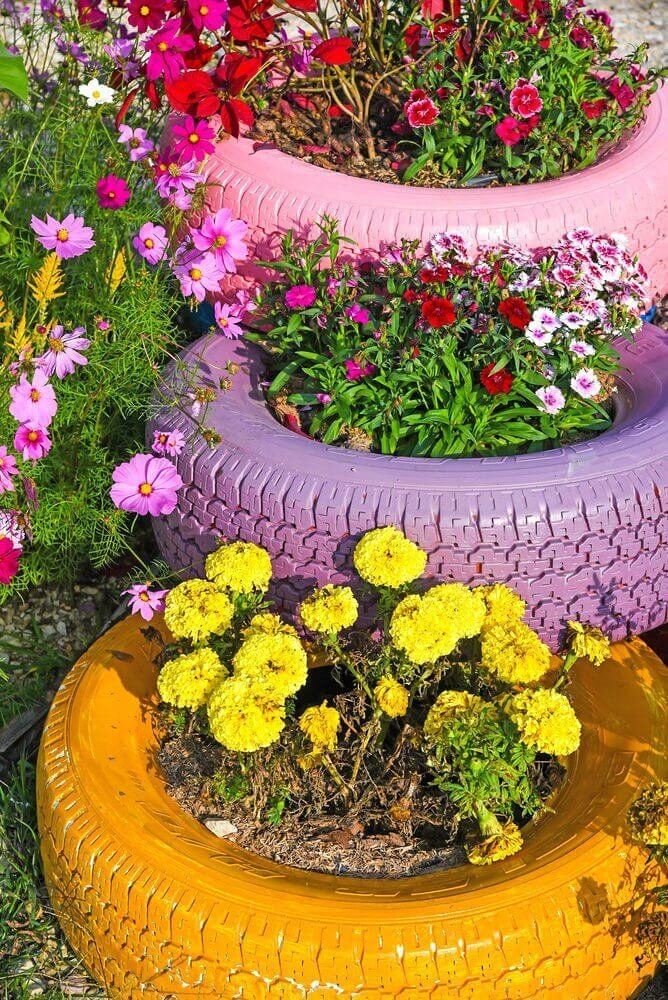
So you’ve recently replaced a tire on your motor vehicle or bicycle and you have opted to keep it at home to re-use as a flower container in the interests of saving our planet. It’s a great idea as long as it’s still in a reasonable condition - not too old or too damaged and it can hold enough soil for the growing plants.
Give the tire some cheerful coats of paint then position it strategically on a stand or the ground in your garden once it’s filled with a cluster of colorful flowering plants. You can even hook up and suspend a small bicycle tire, filled with flowers only at the lower end, from your garden shed or patio. Just don’t try this with heavier tires!
Canny Canned Plants
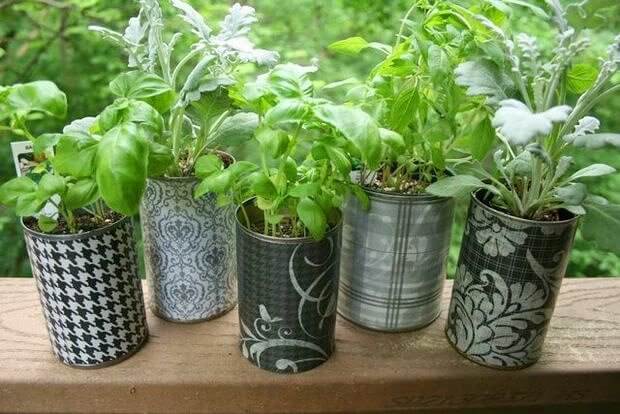
Looking for plenty of inexpensive plant containers? Then look no further than those tin cans that most households use and discard fairly liberally. If they are painted they will make perfect plant pots. Paint them lavishly both internally and externally to prevent rust and beautify them.
In clusters, and planted with foliage or flora, or a mixture of both, they will make a pleasing cost-effective display. Besides, tin cans don’t lose their quality even when used over and over again so reusing them is an excellent way to reduce their impact on the planet.
Raising up Plants
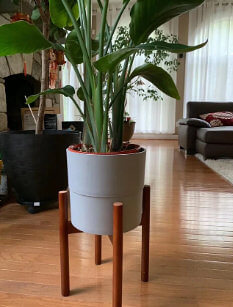
A stylish way to fill an empty wall space in a room is with plants. Add some interest and elevate your potted plant on a stunning stand sturdy enough to resist those little hands that tend to pull things over. To prevent water leakage rather enclose cheaper plant pots with drip pans inside solid, sophisticated containers that will add glamour and elegance to your space.
Opt for an array of striking stands holding eye-catching pots and even arrange them at varying heights to add dimension and character. Choose non-flowering plants with rich green hues or showy flowering ones either in mixed shades for impact or single shades to match your interior design. But, do remember to empty the water collecting in your solid containers regularly. Plants hate wet feet!
Cement Containers
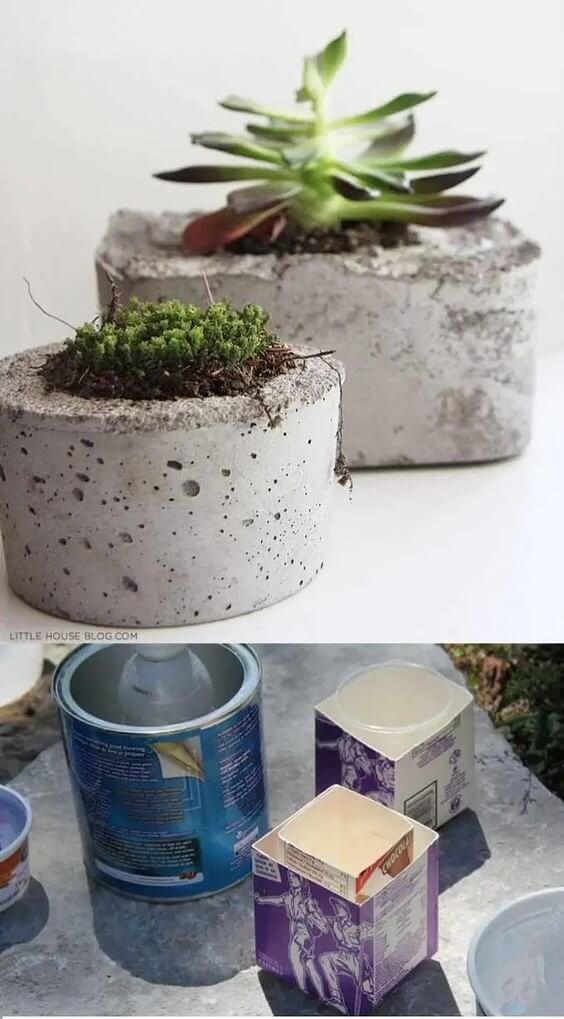
Another affordable way to make your own planters is with cement. They can be big enough for a patio tub or smaller for placing on tables or cabinets. All that is needed is an existing cardboard box, or you can make your own box using a sheet of cardboard glued or taped into shape, and a container to create the central well like a disposable plastic bowl or yogurt container.
When your box is ready, place your container in its center and then pour some ready-mixed cement around the container tightly. Cement is durable and environmentally friendly, and its light coloring prevents the roots from absorbing too much heat or sunlight. Be patient and leave this until the cement has completely set. Then remove the interior container and sand your new planter until smooth. And voila, there’s your square-shaped planter ready for use.
Long, Narrow, and Rectangular
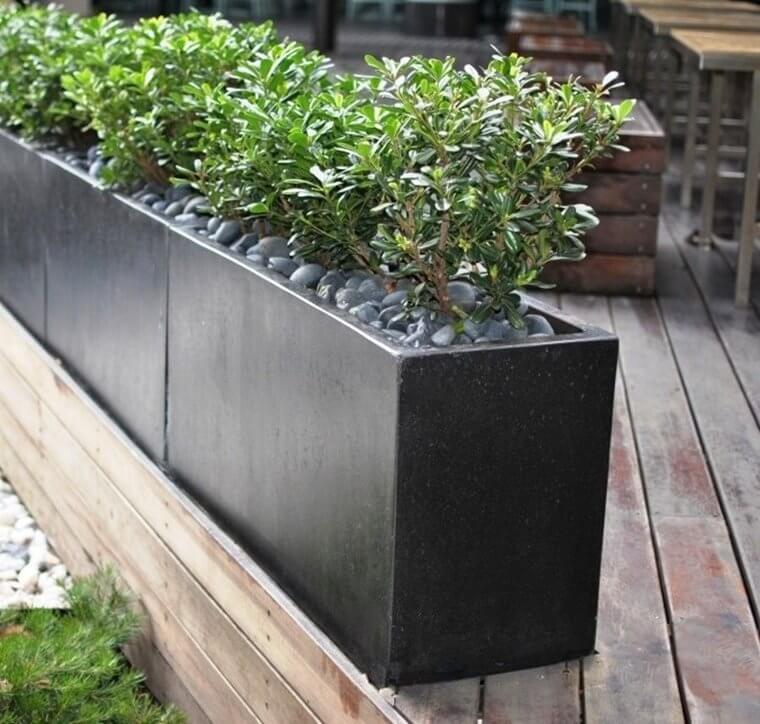
When we think of plant pots, we tend to think of chunky round ones, whether large or small. But when your space is limited and you’re determined to add some welcome greenery, then finding a suitable container may involve a little bit of searching. We are sure you will be surprised by the multitude of options available.
However, consider those longish, flattish, slim, rectangular-shaped planters that fit flatly and neatly against a wall. They take up minimal floor space, vary in height, and can hold lots of lovely mixed small plants or shrubs. Watering and cleaning will be easier and you can place several adjacent to one another in a long line against a wall. That’s another problem solved!
Half-Moon, Flat-Back Wall Hangings
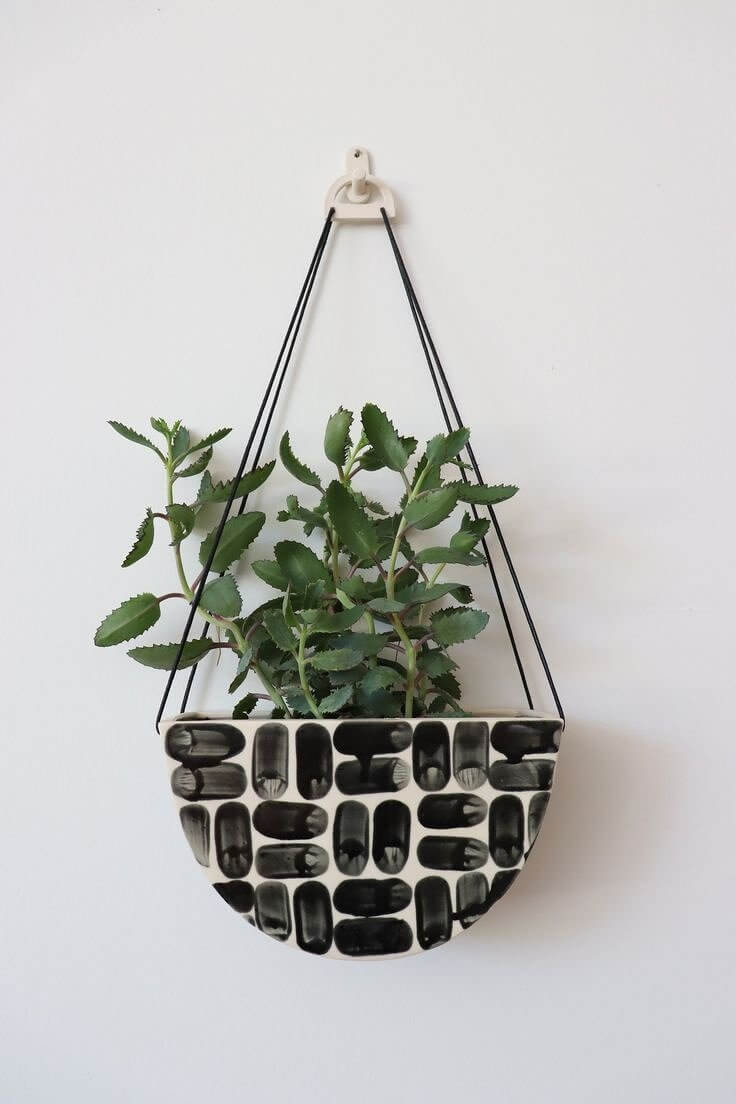
Flat-back planters are ideal for placing against walls as they lie flush against any flat surface. But add some aesthetic oomph by using dainty half-moon or half-circle-shaped planters as your interior wall feature. Arrange them as you wish - haphazardly or across or down the wall whichever way makes the best statement.
Delicate little plants will add life and color to these little planters as well as enhance your decor. Ensure that they allow for proper drainage which is critical for plant well-being or take the planters down to water them outside. One filled with vibrant plants and fixed on the entrance doorway wall of your home will create impressive first-look appeal.
Raised Plant Rests
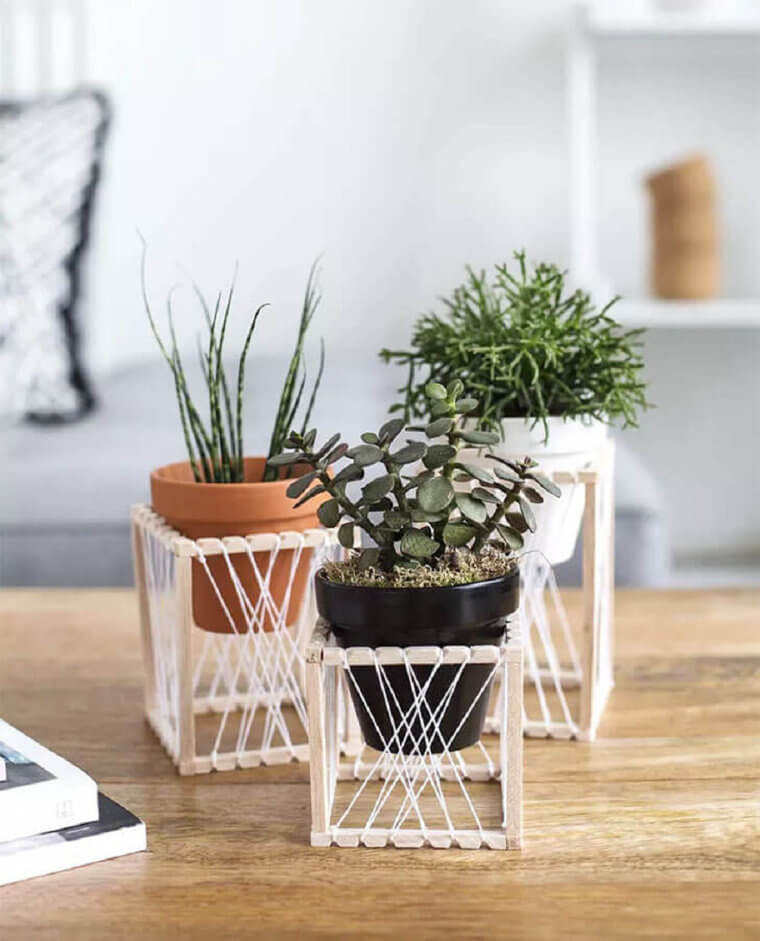
To improve water drainage and circulation beneath a plant pot then raise the pot slightly from the table. This will be highly beneficial to the roots of your plant. To control the height raised get out your DIY hat and make some plant rests. It’s easy with string and some straight and some grooved lengths of wood.
Make a cradle for your pot by winding the string around the wooden strips in an attractive pattern, or in a cross-over shoelace pattern like here. Balsa wood is best as it is known as the lightest and softest hardwood timber and for being quite easy to work with. A few stringings later and your plant pot rest is ready!
Hand-Shaped Sculptures
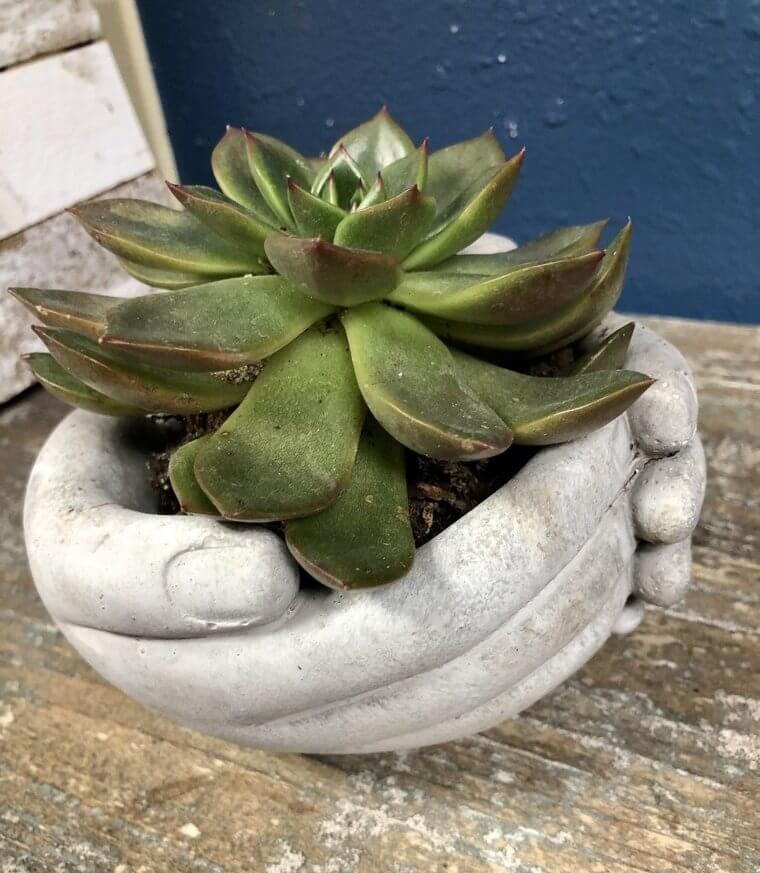
We were so impressed with the success of our homemade cement planters that we decided our next project would involve a little more difficulty and would be more creative. This time we were aiming for a small smart sculptural planter. For this piece, we chose the cement that gives a smoother finish to the surface.
Pack a pair of gloves with cement and then squeeze each of the fingers to eliminate any air. Make a slash on the edge of each little pinkie finger. Place the gloves side by side, press to join the pinkies together at the slit, and allow the two glove hands to dry together as a single pleasing sculptural planter.
Reused Plywood Oddments
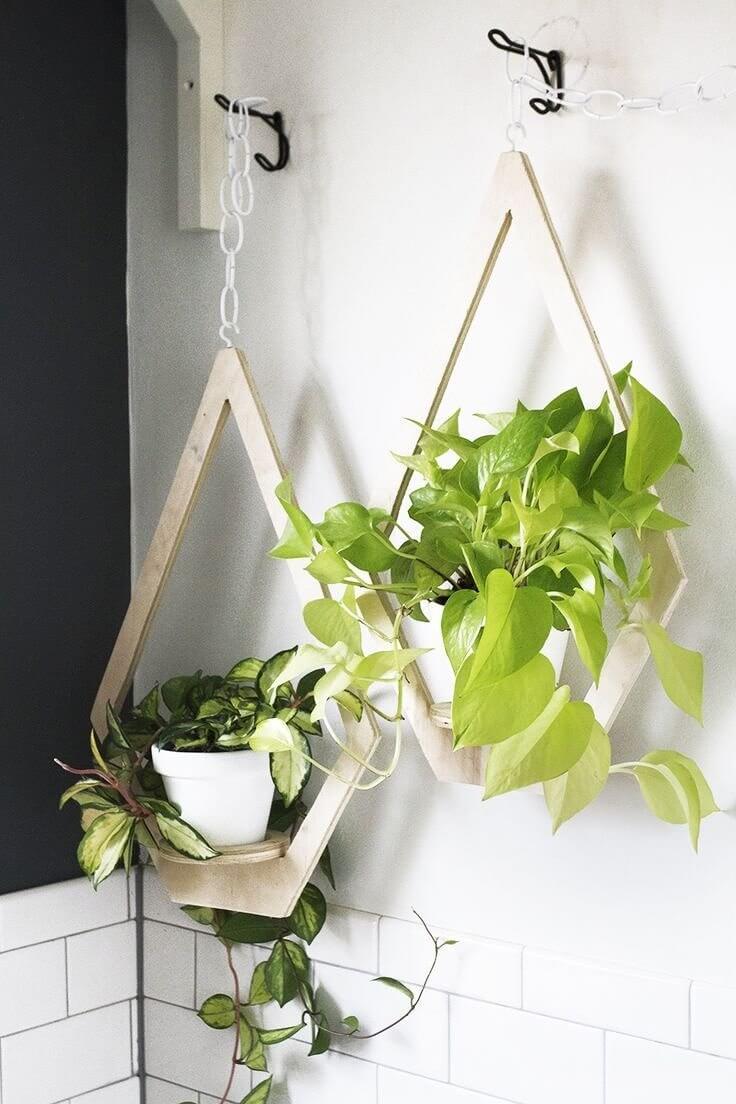
When looking for inspiration to hang some planters, we searched the internet and came across this DIY suggestion which had loads of appeal. It was more than perfect as not only would it utilize some of our leftover plywood oddments but would also cost us less than $40.
We made a template on the plywood and created a good-sized pilot hole in the middle of our design. Before gluing them together with a hot glue gun, we trimmed and sanded the plywood pieces. When these were thoroughly dry we attached some strong string to hang up our planter securely.
Wool-Entwined Baskets
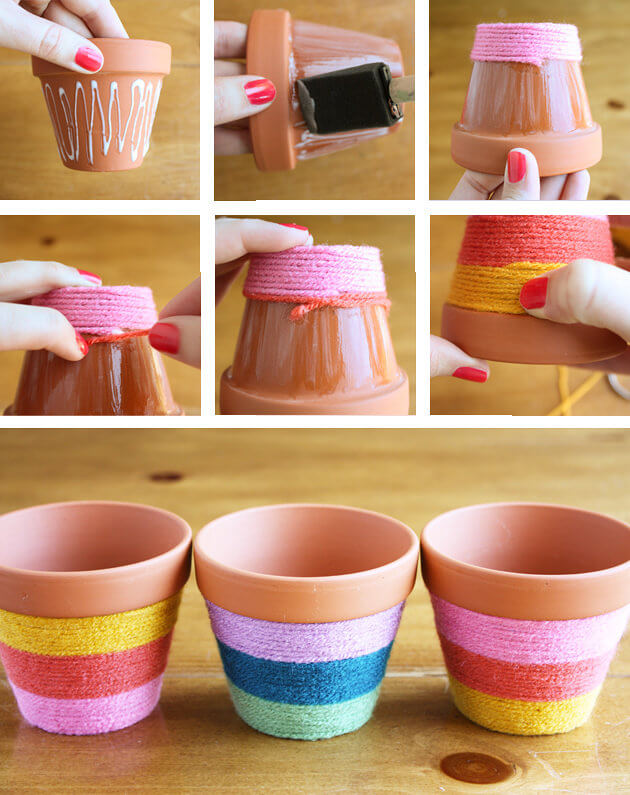
If you have space for planters where there is lots of sunlight for most of the day, then make one or more of these colorful attractive plant baskets. Get yourself a piece of jute fabric or a ready-made basket woven with cane strips and work colored wool in patterns through the gaps.
These baskets have many uses but are only ideal as plant containers if you add a plastic liner or two inside before filling them with soil for your precious plant. Wool has many benefits. It’s natural, durable, flexible, stain resistant, anti-microbial so it won’t smell, and is 100% biodegradable. Additionally, it will release nutrients back into the soil.
Repurposing Paper Roll Holders
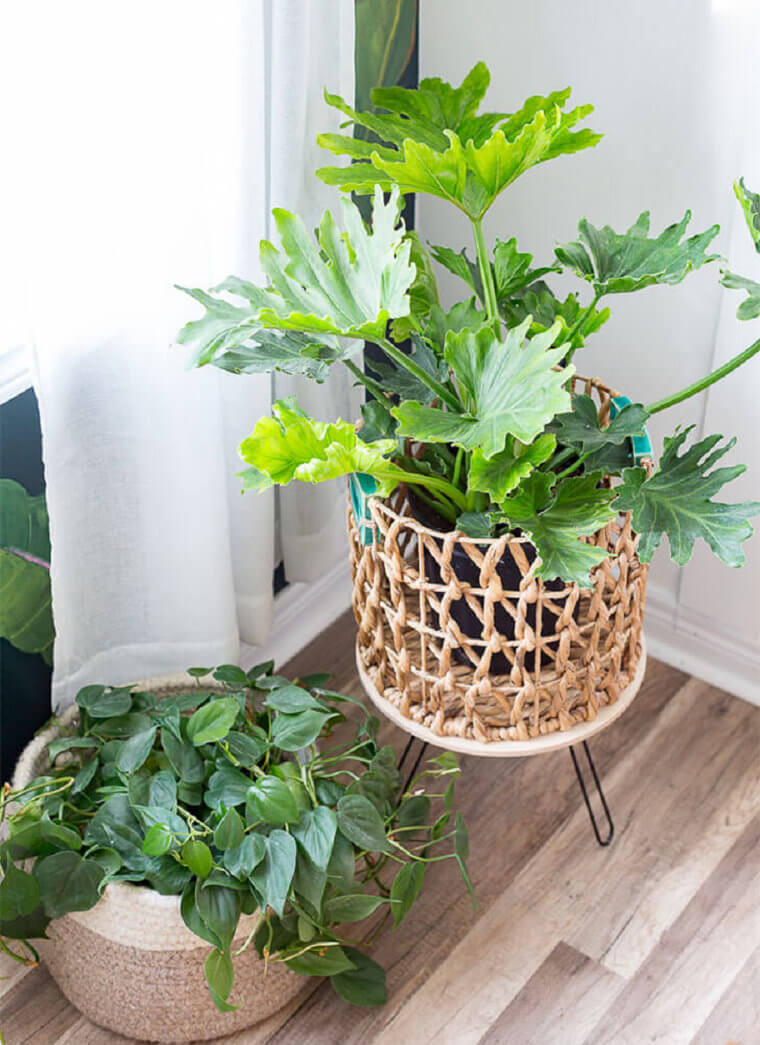
So, you’re one of those people who hates throwing things out because you feel that they might come in useful at a later stage. In this case, it may be the old kitchen or bathroom paper roll holders you're switching up to ones. If that's the case, then this repurposing idea is for you. Firstly you will need to find some plastic bags in the same color.
Then simply intertwine these together and create an attractively patterned and airy container in which to display large, indoor pot plants. Make a sturdy stand for it by reusing an old paper towel holder and screwing it to the base to form its legs. Add a lovely leafy pot plant and then find the perfect spot to showcase your creative container.
Denim Jean Stand-Ups
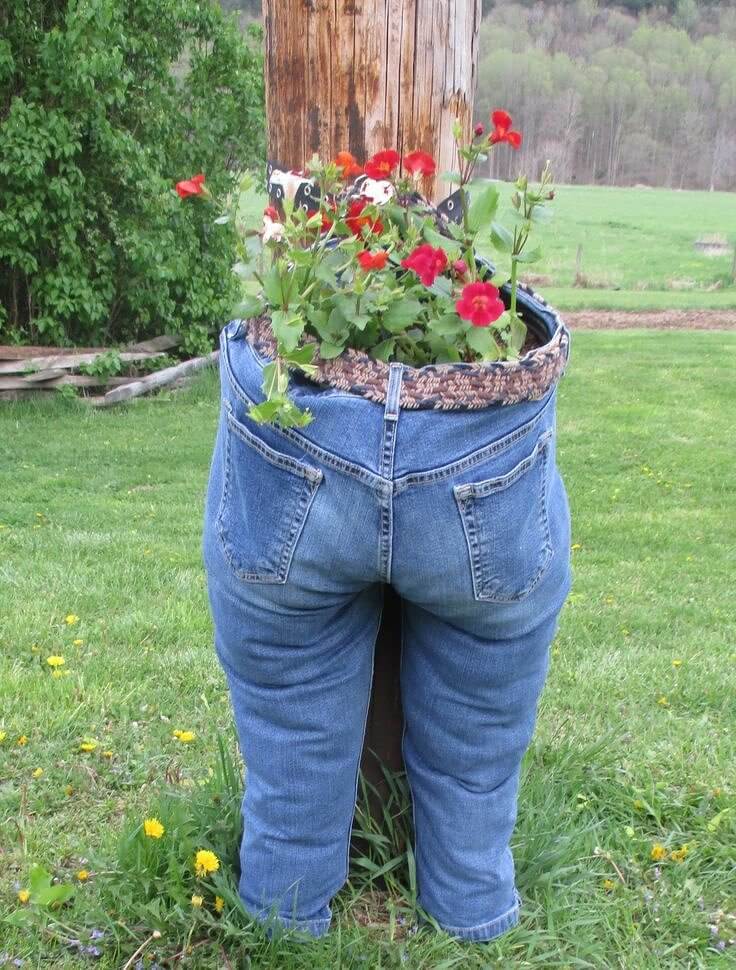
This idea makes a rather eerie but human-like planter and it certainly puts a no-longer-worn pair of denim jeans to good use. We also think that in the dark of night, in the right spot, it might create confusion and be an excellent burglar deterrent because it sure creeps us out.
Stand your denim jeans in an upright position and stabilize them, with or without a mannequin leg, by packing the legs with solid items like wood, plastic, or cement. Then fill the rest of the jeans up to the waistband with good, healthy soil and plant some seeds or a smallish lightweight shrub or two.
Decorative Door Planters
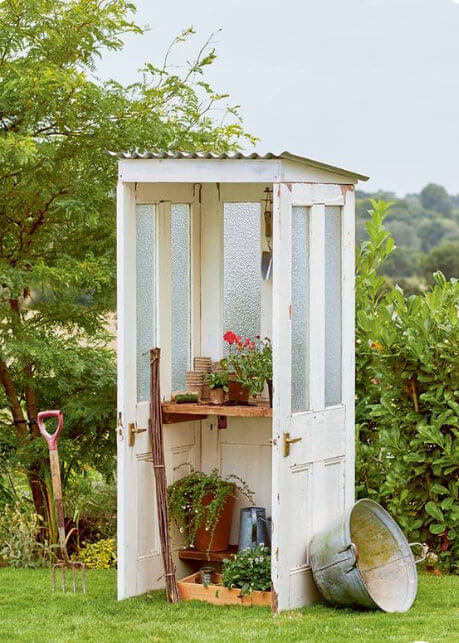
If you have any old wooden doors lying around in the garage, why not remodel them into a tall outdoor planter? After all, wood is organic, durable, and weather-resistant making these old unused doors ideal for your garden. Besides, they will free up some garage space. You will only need three of them for this project.
Dust them, sand them, paint them if needed, and cut and shape them so that they can fit together nicely and neatly. Then, position one on each side, and secure them together with glue, bolts, and screws. Add a couple of recycled wooden boards for shelves and voila, there’s your completed garden planter just waiting for its floral companions.
Ombré Planters
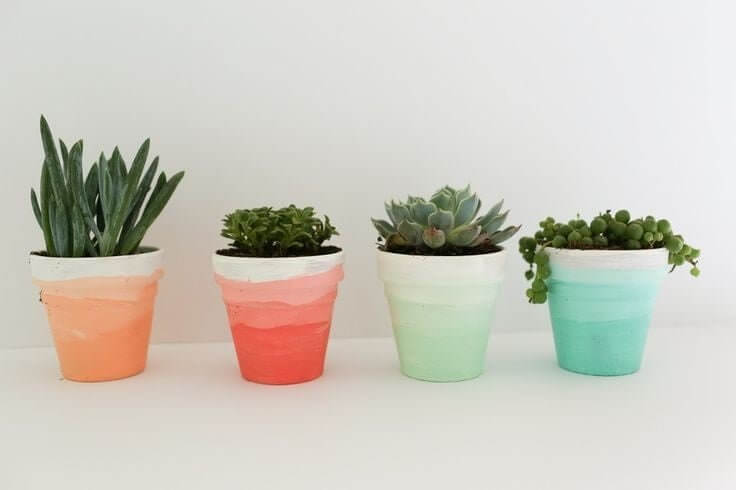
Perhaps you’re not a fan of either bold or pastel colors for your pots but prefer a shaded look where your color choice fades from darker to lighter or vice versa. This is called the ombré look and will match perfectly when the decor also consists of shadings in a singular color.
Paint your entire pot white first. Then paint the bottom in your chosen shade and continue painting moving upwards as the brush starts drying out. When the paint is dry you can add the soil and get planting. Flowering plants to match your ombré color will add quite a stylish touch.
Reusing Old Clothing
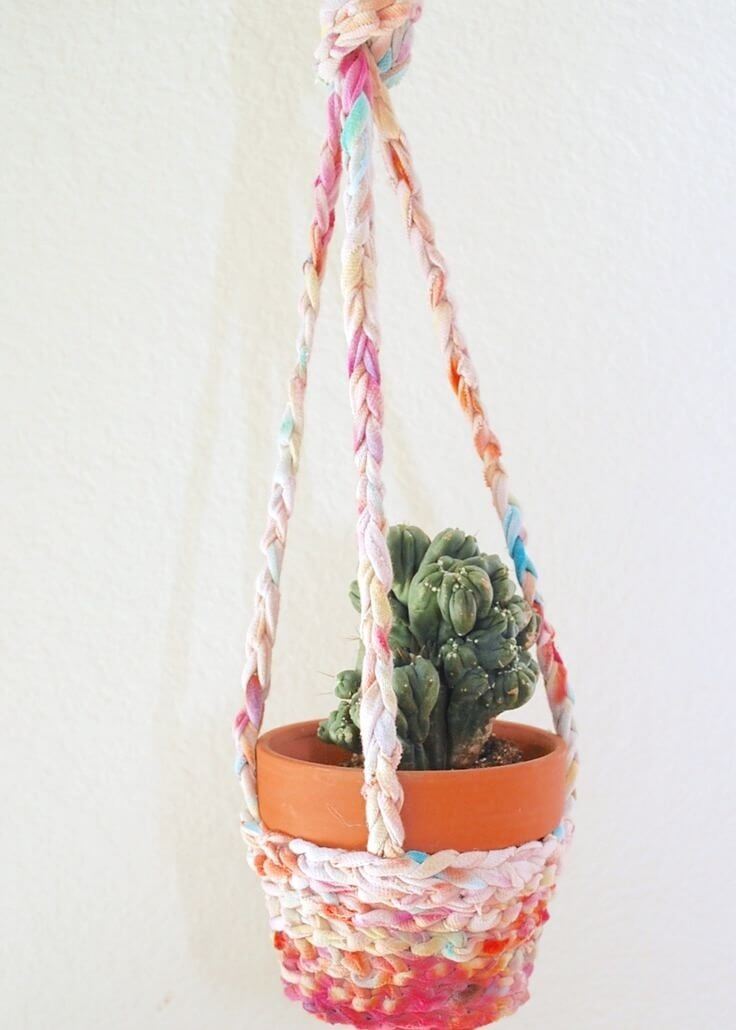
If you’ve got into the habit of holding onto old unused clothes because, from past experience, you’ve learned that later when you find a use for them it’s too late they’ve been thrown out. If you have some old shirts lying around in the wardrobe, then you’re good to go with this option.
Cut the shirts into thin strips, roll the strips into ribbons, and weave them into a pattern of your choice, or like here as a spider web. Don’t forget to knot them in matching places and knot all the ribbons together at the top so that it will be perfectly secure for hanging your planter.
Going Geometric
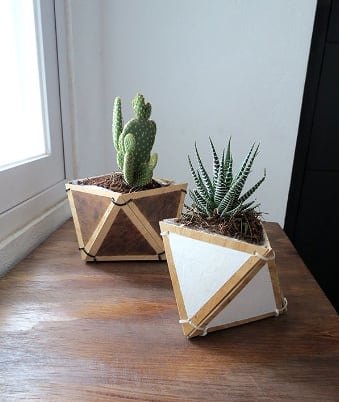
While we do so love those chubby round little plant pots, now and again we fancy changing and having a few geometric-shaped ones. We tried out this easy method with just glue, some spare cardboard, and scissors. We also used some tin foil and some shiny copper-colored metallic paper for decoration.
First, we shaped our planter by cutting and folding the cardboard and gluing foil or metallic paper onto it. And that’s all it takes, a quick and easy five minutes to make each new little geometric planter. They will look so quaint, cute, and adorable when filled with tiny ornamental plants.
Planters À La Memphis Style
Do you find yourself reminiscing about and yearning for the Memphis style of the ‘80s recognizable for its bright primary, pastel, and neon colors, distinct patterns, stripes, and bold geometric shapes? Well, why not apply that trend to your planters and give your space an uplift?
To start with paint some straight-edged planters completely white, and then add your patterns in bright colors with bold stripes and shapes à la Memphis style. They will brighten up your space and make you feel right at home as if you’ve been transported back in time to the ‘80s.
Rectangular and Metallic-Looking
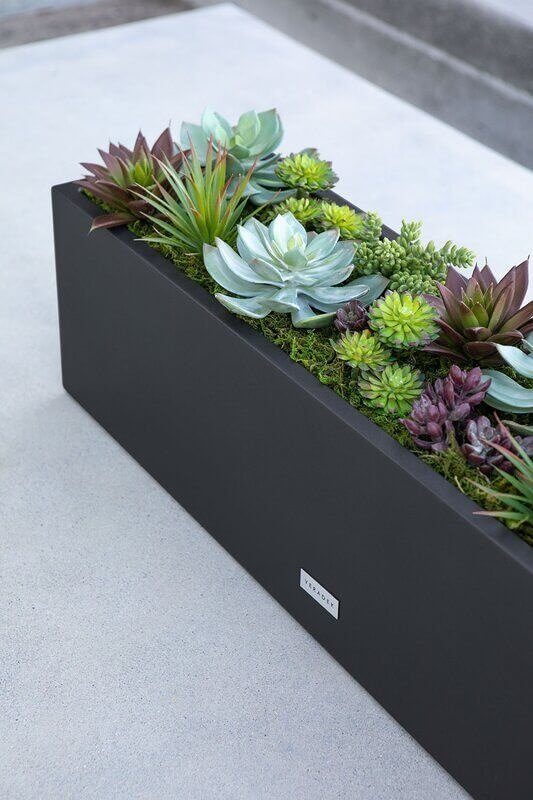
If your interior design is all about style and sophistication and your aesthetic preference is the monochromatic look then perhaps one of these long, tall, polished rectangular metal planters will match your aesthetics admirably. It looks beautiful and stylish and it will only set you back just over $200.
Of course, with a little bit of DIY ingenuity and skill, you too can build one for $50 as this person did. No, you won’t need a metalworker or to have metalworking tools because this planter is, unbelievably, only made from wood. It gets its metallic sheen look thanks to the paint color called Peppery by Behr.
Marbelized Magic
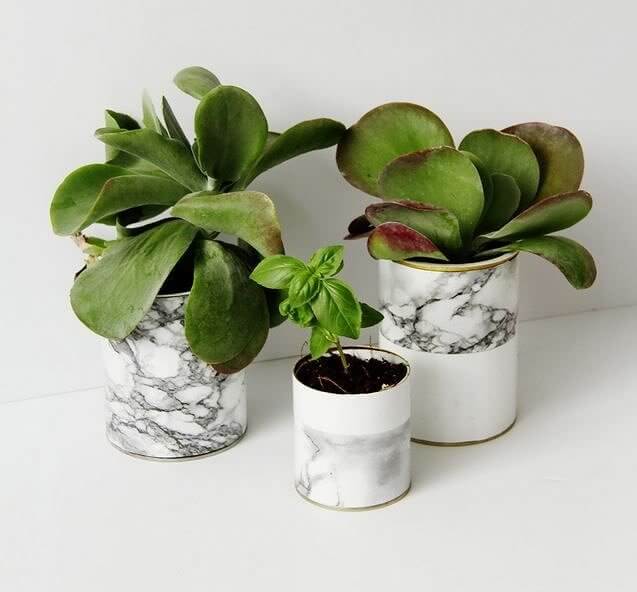
Were you a fan of the ombré look for your pots when it was fashionable? And how do you like the newer marble appearance of pots nowadays? Even if you didn’t venture into DIY then and create some ombré pots how about trying to recreate a marbelized look on some plant pots now? It’s really great fun!
Spray some sleekly finished pots with white paint both inside and out. When this coating has dried, fill a container with lukewarm water, and add some drops from two different colored nail polishes. Swirl this with a toothpick and then dip your pots into this mixture. When dry we are sure you will be greatly pleased with their marbelized result.
Mannequin Heads
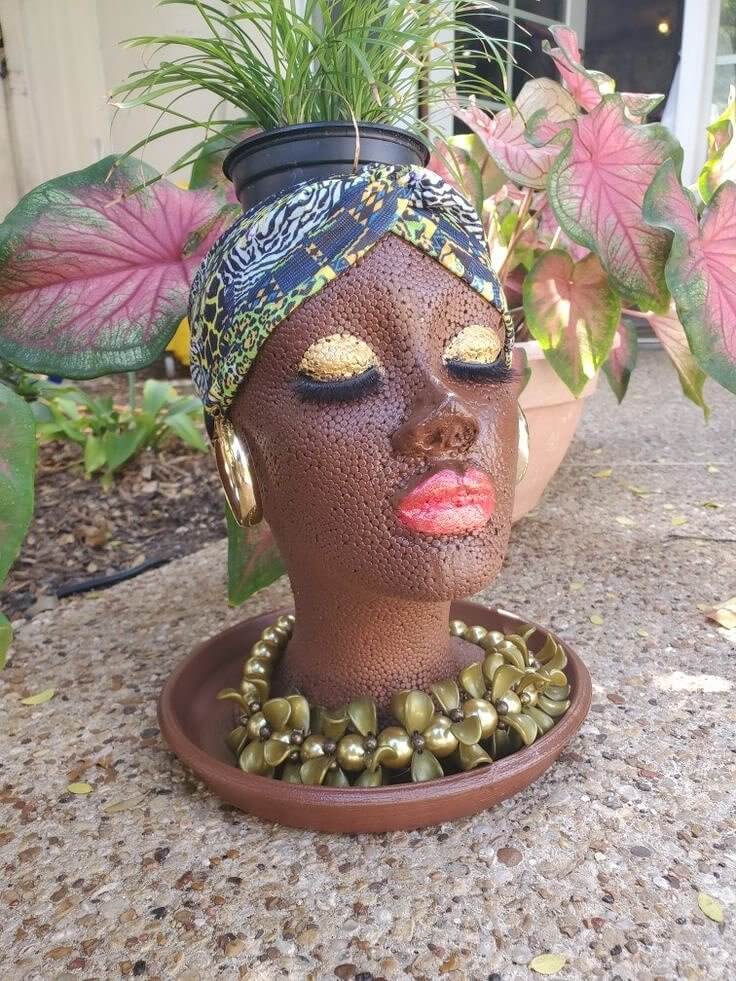
A current trend for planters is using mannequin heads. Simply gouge out the top part of the head (the brain) and fill it with potting soil before planting some seeds or artistically arranging a lovely mix of tiny plants. Put it in a sunny position, water it regularly and it should reward you well.
It may not be easy finding an inexpensive mannequin head but, if you are lucky, it doesn’t matter if it is made from plastic, fiberglass, or styrofoam. If the dollar stores don’t have them then you may have to raid the dumpsters at the mall. But, it does make a regal and stately artistic planter in any home.
Blooming Rubber Boots
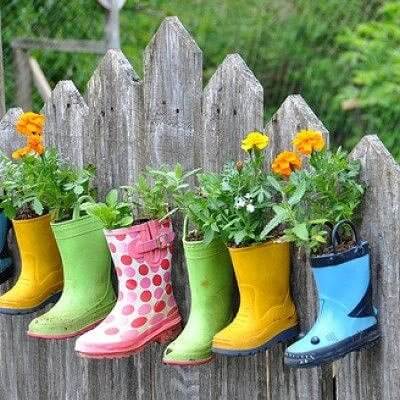
We’ve heard of parents casting their kid’s shoes, especially those of the firstborn, in metals like bronze or copper. It’s a keepsake to treasure and remind them of their child’s precious first steps. But what have they done with the rest of the baby shoes like the wellies or galoshes? Are they lying forgotten in the basement or loft?
Well, now it’s time to bring them out and give them a new lease on life. They can be used as gorgeous garden or patio planters. Just put some holes in the soles, add potting mix, plant some seeds, seedlings, small shrubs, or cuttings, and water regularly. This will encourage bonny blooms with the old boots beautifully placed in your garden or on the patio.
Hanging Baskets
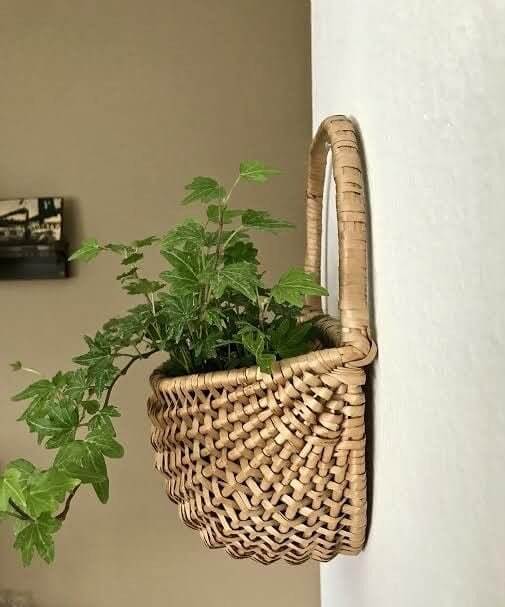
Living or green walls are currently very trendy. They are vertical structures that are hung against a wall and covered in living vegetation. This version is slightly similar but smaller in scale and a rather neat way of using little baskets forgotten at the back of a cupboard to create an eye-catching hanging wall decoration.
You too can create the same. Just get some hanger kits, jewelry wire, pliers, and your pet plant or pretty faux foliage. When the basket is attached to the wall just slot and fix the plant in at the chosen angle. However, if it’s a living plant be sure to add a waterproof liner to the basket first.
Feeding Trough Transformation
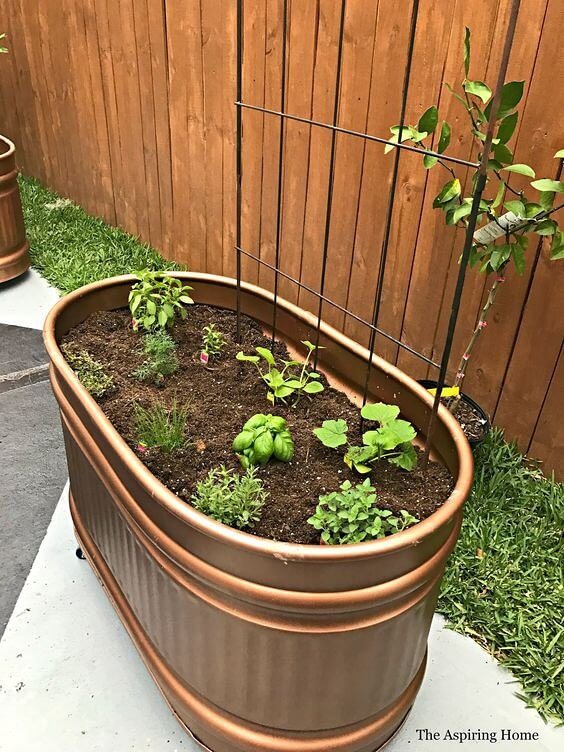
So often we are amazed at how someone sees the potential in something that someone else no longer wants and at how creatively he utilizes it. These large old metal troughs used for water or feed for farm animals are a perfect example of smart recycling.
While galvanized tubs and water troughs offer a multitude of repurposed options, here they have been reused as planters in the garden. Give them a wash, a wipe, and a copper paint coating to deter rust and they will look stunning and brand-spanking new. Add some foliage and they will look great!
Little Glasses Board
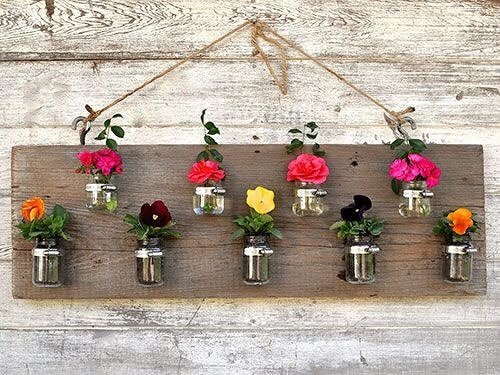
If you’re the type who gets bored easily with your decorations and wants to be able to change them regularly then you will find this idea most suitable. All you will need are some screws, clamps, hooks, strong string, an old plank of wood, and some little bottles like empty baby food bottles.
Clamp the little bottles to the plank, add the hooks, and knot the string onto the hooks ready for hanging. This is such a versatile hanging for indoors or outdoors with uses varying from trying to root little cuttings, holding candles, or serving as a flower vase holder or planter. You definitely shouldn’t get bored with this ornamental board.
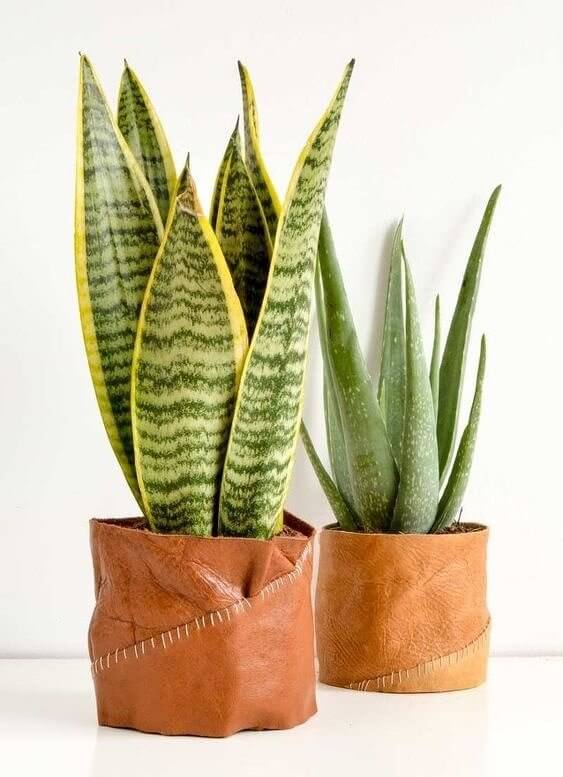
Faux Leather Planter
If leather is your thing, this idea will catch your attention especially if you have a pot that is looking a bit past its prime and could do with being spruced up. Faux leather will do the trick. Besides being appealing it is waterproof and will retain its shape and condition for a long while.
For the base cut out a circle from a board of plywood. Then from a length of faux leather trace and cut out the wrapping piece. Use specialized leather glue to join the two sides of the wrapping together to form the planter wrap and then the bottom edges together and your faux leather planter will be ready.
Coathanger Planter Supports
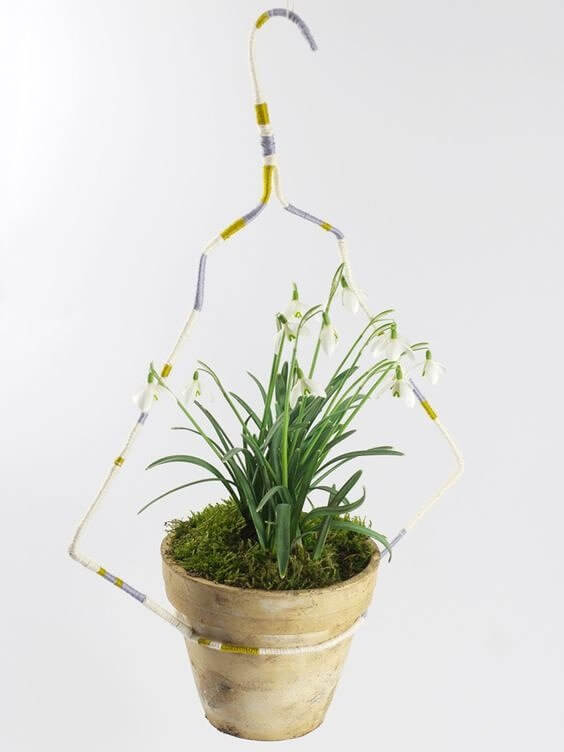
Those ubiquitous dry cleaners' wire coathangers keep on accumulating and getting entangled where we keep them at the bottom of our wardrobes because we find they’re too slippery or lightweight to use for our clothing. On average they measure 17 inches (43.18cm) lengthwise and 44 inches (111.76 cm) straightened, so surely we should be able to find a better use for the wire.
Being very flexible, wire coathangers can be molded easily into any shape. One great gardening idea is to wind the long, dangling stems of a potted plant, like ivy, around an arched and embedded into the soil wire hanger. Giving the plant more height will add shape and interest. Or, as we see in this example, bend the hanger to serve as a strong hanging plant pot support.
Sprinkler Guard Planters
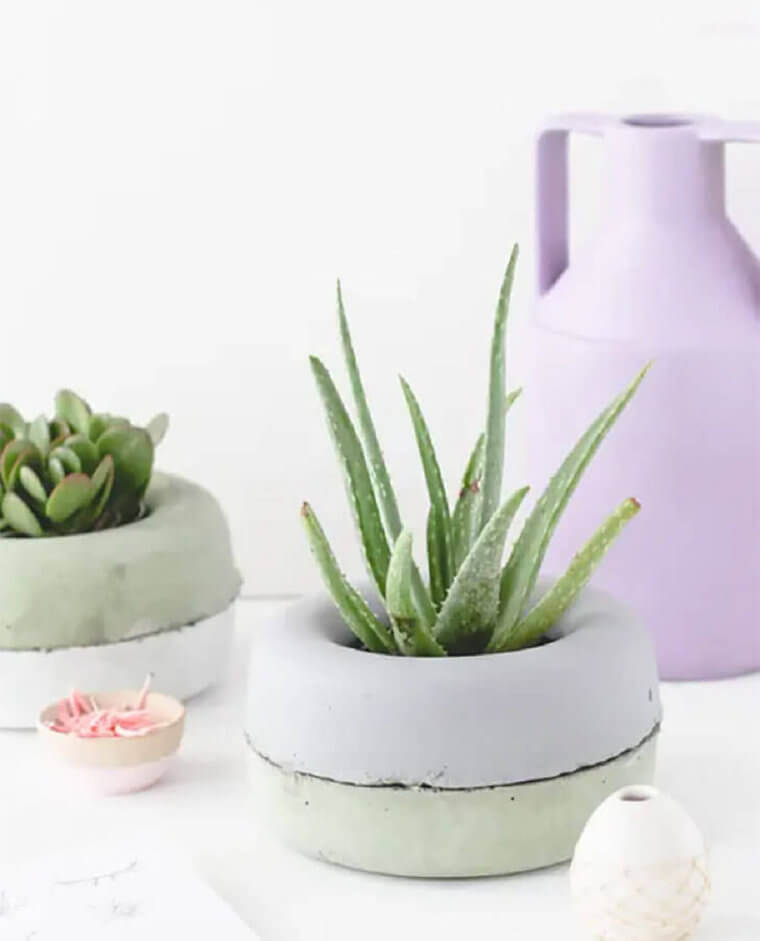
Do you recognize these phenomenal planters? You got it! They are indeed circular cement sprinkler guards adeptly recycled into ideal containers for indoor plants. These can be smartened up and painted before topping up the premade hole with potting soil and a coveted plant. If necessary, give each base a brush of cement, but even without this, they stack together securely.
Purchasing these new may not be an affordable option for you. But, if you’ve already displayed a penchant for and superb skill in creating your own DIY cement planters, why not try making your own? As Amazon sells a donut-shaped mold that has a three-inch hole for you to make your own sprinkler guards, this should be a simple and successful project for you!
Patterned Terracotta Pots
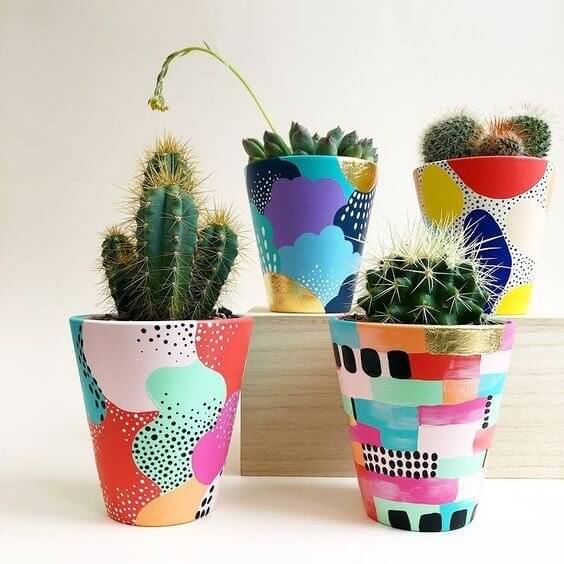
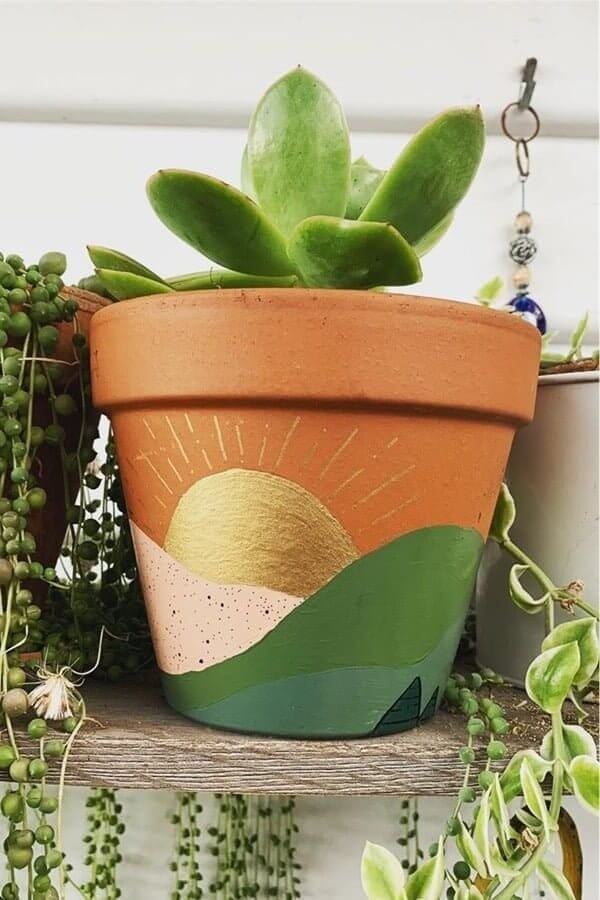
Having a collection of those dear little terracotta pots is all very well but they may not blend with or add much glamour to your garden or interior design. Using a thick paintbrush personalize them with painted patterns in the colors of your choosing. Just remember that circles, half-circles, and semi-circle patterns are currently in vogue.
Unless you’re a dab hand at painting, and on little pots, don’t expect to paint flawless patterns with perfectly straight or round lines. Whatever you do will be reflecting your personality and add your personal touch. Have fun and enjoy the fine finished products when filled with greens and dotted around your home and garden!
Plastic Bottle Planters
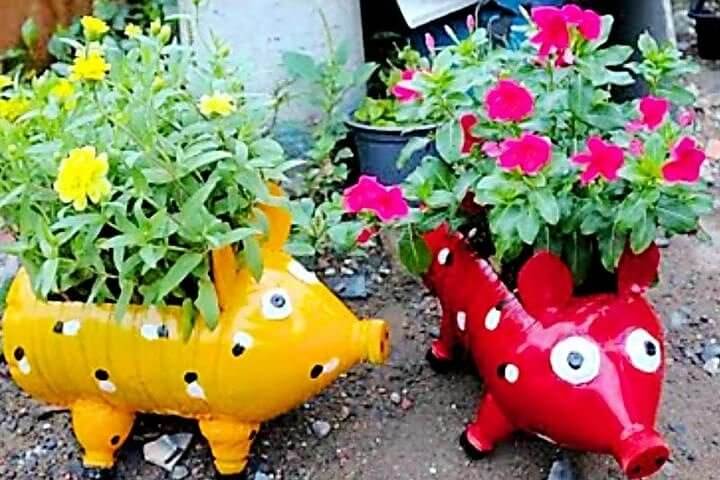
These days so many products come bottled in those largeish plastic bottles that any amount of these can be acquired very easily. This enterprising gardener found a marvelously inventive way to use them and made this gem of a planter. We bet he has quite a few more of these glorious delights elsewhere in his garden.
He turned the bottle on its side, scooped out a section, and gave it a hearty coat of paint. Then he poked a few holes in the bottom and filled it with pebbles for drainage and potting mix. Best of all, he planted a hot pink colored flowering plant to match his plastic planter! We are so impressed and inspired we aim to try this ourselves.
Hanging Disco Balls
Most of us love it when the sunlight passes slowly across our room highlighting the colors and textures and warming our space. It makes us feel alive and happy. A well-used trick in interior design is to hang mirrors or arrange furniture with reflective surfaces to increase the natural light in the room. But, another clever way is to hang a disco ball in a good sunny spot.
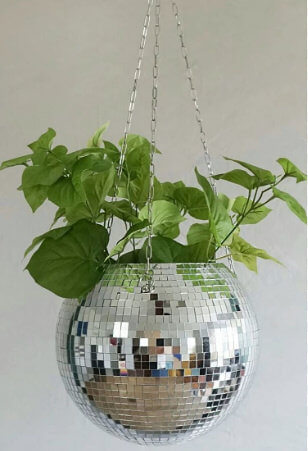
For added impact convert them into striking and eye-catching hanging planters like these. Take off the top, add anchors like fish plates, and fix three long metal chains to these to ensure it hangs securely. Add a plastic liner or drip tray, some soil, and a charming plant. Hang several closely together, even in varying sizes, and they will make a glitzy and glamorous display even when there is no sunshine.
Cherished Childhood Toys
What can we do with those beloved toys of our childhood? Very often they lie buried in a box or chest in the basement storeroom or the attic until we have to search for something and discover them again. Bring them out, dust them off, and give them a new lease on life. You will love them all over again!
Here we see how they have been repurposed as intriguing containers for tiny plants. A metal smith may have to remove a piece from the top and drill drainage holes if you are not able to do this yourself. Choose a tiny plant to grow in it and then place your charming little planter out on display. It will bring back lots of memories!
Oven-Baked Clay
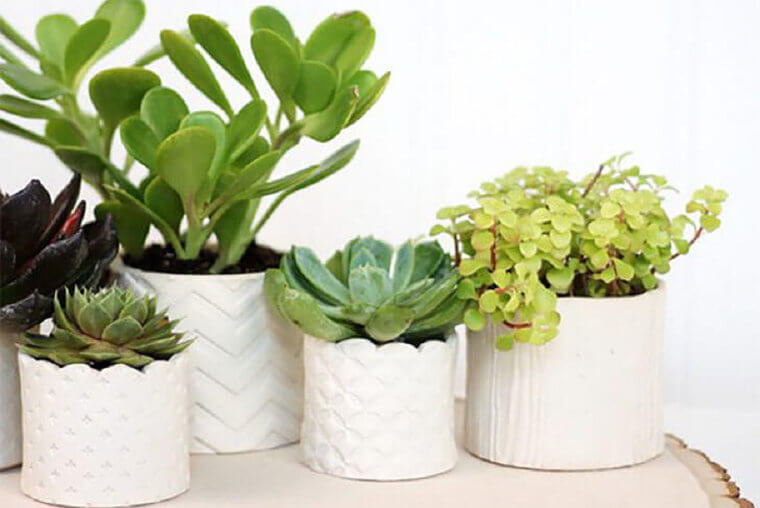
Aren’t these beautiful posh plant pots? Can you picture how wonderful they will look in your home? Then simply make your own. It’s so easy with oven-bake clay, a rolling pin, a non-stick baking sheet, a reliable old knife, and your chosen template. Spread some clay on the baking sheet, cut around your template, and then seal your cut-out tightly before baking.
Oven-bake clay has many benefits as planters because it allows great airflow for the plant’s roots. It’s affordable, easy to use, and available in an endless array of colors and textures. It also combines well with other materials to create a mixed-media appearance. When baked, you can even add some extra finishing touches by sanding, painting, or carving a design into your creation.
Old Wooden Cabinets
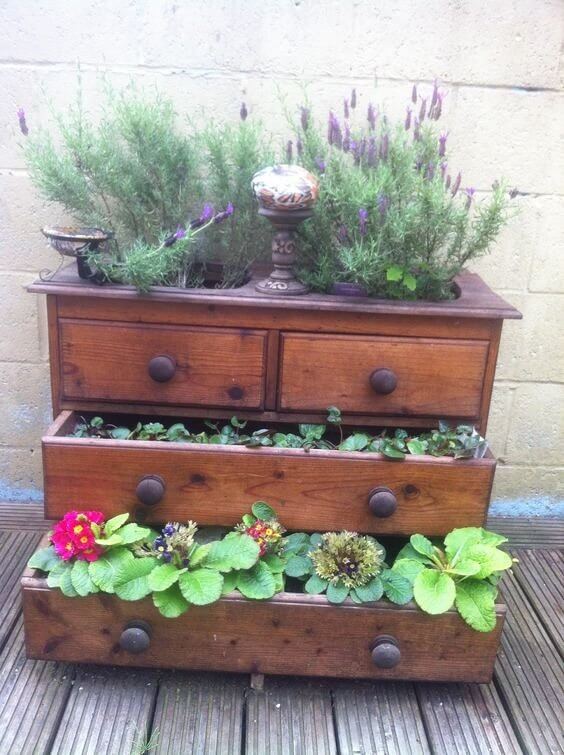
If you have an old wooden cabinet or chest of drawers that you no longer want, don’t discard it at the dump or second-hand store. Rather place it outside your garage or garden shed, spruce it up, and repurpose it as a fun attractive repository for pots, plants, and garden implements.
Using wall anchors attach finials to the side of a drawer without making any notches. Drill holes and then screw in the pulls. Then seal the drawer after staining it. Fill the drawer with good potting soil and begin adding your greenery or floral choices. Intersperse your plant drawers randomly to create a more dramatic effect.
Woven Patterned Fabric
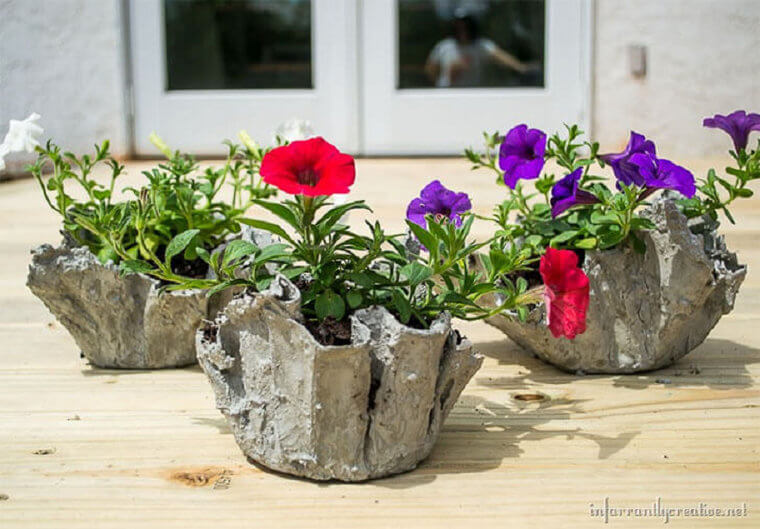
Sometimes people prefer planters that are less streamlined and have a more rugged look. These satisfy both and what's more, they can be made affordably at home. Find a piece of fabric with a pleasing woven pattern, soak it in cement and wrap this artistically around a plastic bowl and allow it to dry well in a warm spot, possibly for 24 hours.
If the dull grey color is not to your liking, then maybe press a few colored glass stones into the cement while wet or protect your dry plant container with a coat of colored paint. It’s best to use water-based acrylic concrete paint which mixes and spreads easily and is resistant to both water and inclement weather conditions. In fact, it's a very simple useful DIY product.
Burlap for Containers
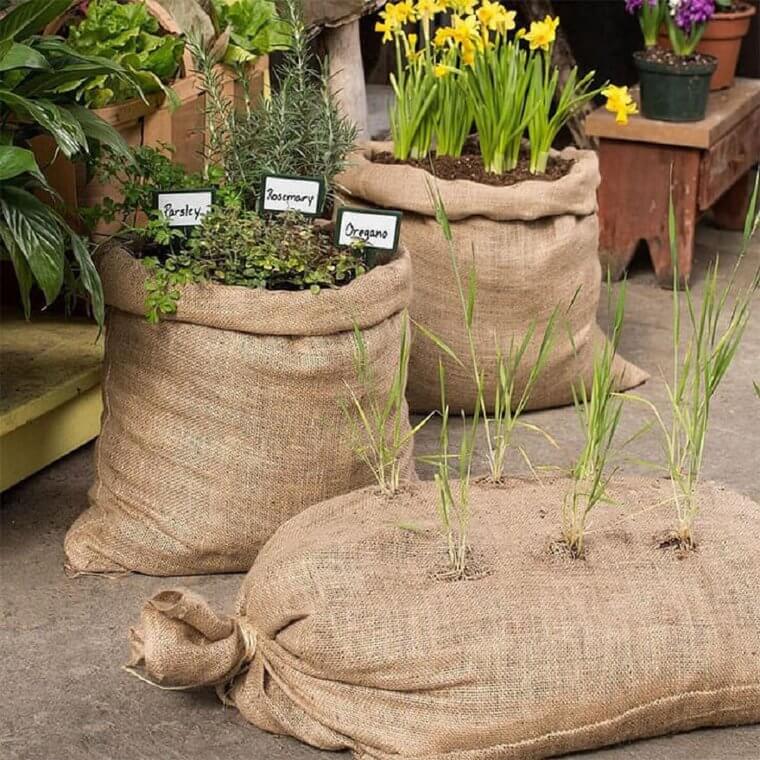
Here's another inexpensive DIY suggestion for gardeners looking for an ingenious method of growing flowering plants, veggies, and herbs or for cultivating new plants or shoots in the home nursery garden. Burlap is the ideal choice whether in bags or lengths of fabric. Being porous burlap is breathable, and doesn’t retain any water so drainage holes and stones are not necessary, and it doesn’t get moldy.
Think of big rounds of burlap fabric pulled up and tied around a potted plant, or a burlap sack tied at the neck, placed down lengthwise but filled with soil, with holes inserted and plants pushed through these holes, or a sack standing upright when filled with soil mix with the neck folded open to reveal its pretty flowering plants or cluster of delicate herbs. There are just so many options with burlap.

